Tuning Your Snowboard
If you are passionate about snowboarding, chances are you enjoy even the more “mundane” tasks associated with riding. Cleaning, repair and other maintenance of your snowboard can always be taken care of at the shop, but if you want to save some money and do it yourself, there are plenty of things that you can do on your own. Be sure that you don’t take on too much, though; if there is major damage to a board’s edges, topsheet or base, you should let a professional take care of it.
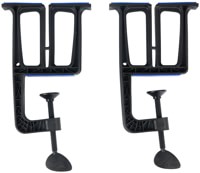
To start, it is usually easiest when your work station is at-or-around hip height. Additionally, while not necessary by any means, a board vice is highly recommended to keep your equipment from moving around during scrubbing or scraping. With the proper equipment and a little knowledge, it’s easy to clean and wax your snowboard’s base, repair small dings and tune your edges.


Shop Snowboard Tune & Wax Supplies
CLEANING
MATERIALS
- Dry rags
- Base cleaner
DIRECTIONS
You should clean the base every few times you ride, and every time you wax. Set up an area to work in, with decent ventilation and room to lay out your board, base side up (garages and backyards tend to do the trick). First, use a dry rag to sweep any dirt or dust from the bottom of your board. Make long, straight strokes from end to end until the base is clear of surface filth. This is a good time to give your board a once-over, looking for any nicks or scratches in the base material or along the edges.
Next, apply a snowboard base cleaner to the entirety of the base. You can either soak a rag in the cleaner or spray it directly on the board and rub it in gently. Once you’ve covered the whole bottom surface, leave the cleaner to do its job - removing the wax, grime and build-up on your base. This generally takes 15 minutes, after which the cleaner will have evaporated, leaving your board ready to be waxed after one more quick wipe-down with a dry cloth.
DING REPAIR (BASE)
MATERIALS
- P-tex candle
- Matches or a lighter
- Scraper
DIRECTIONS
It’s common to scratch or ding the base of your board by riding over rocks, branches or while sliding rails. Simple repairs of gashes can be done at home using a P-tex candle, available here. Before applying wax, but after a thorough cleaning, light the end of the candle while holding it about an inch above the ding. Let the dripping P-tex fill in each scratch, then give it a few minutes to dry before removing the excess off the top with a scraper. Follow up with a good waxing, and you’ll be all set.
EDGE BEVELING
MATERIALS
- Gummy stone
- Dry rags
- Edge file
- File guide
- Diamond stone
BACKGROUND
Edge tuning is a great way to customize your snowboard. Depending on the type of riding you do - freestyle, all mountain or freeriding - the rails of your board should be beveled to meet the requirements of that particular style. There are two surfaces on each edge: the base (lies flush with the base material) and the side (runs along the side of the board). Generally, if you bevel the base edge it makes turning easier, because it extends the bottom of the board out further, putting more base and less side edge against the snow. Beveling the side edge will increase the grip of the board, meaning that it will bite into the snow during turns and stops, lending more control to the rider. You have the choice to either bevel both edge surfaces or just one. The table below gives you an idea of what angles you might consider depending on the snow conditions and your riding preferences:
| Problem | Tuning Tip |
| Hard pack snow or ice | Bevel just the side edge a degree or two (88-89°) |
| Snow is too soft to turn | Bevel just the base edge a degree or two (88-89°) |
| Board is torsionally stiff, hard to turn | Bevel just the base edge a degree or two (88-89°) |
| Board is difficult to turn, not enough bite in snow | Bevel both base and side edges the same amount (keeps 90° intersecting angle) |
DIRECTIONS
To get started, set your board on its side with the base turned away from you. Lightly run your hand down the upturned edge, feeling for any notches or burrs and looking for rust patches. Before you actually tune the rail, you’re going to want to remove these blemishes with a gummy stone. Moving from the nose down to the tail, run the gummy stone along the base and side edges to polish them. Finish with a dry rag to remove any ground-up rust.
Now you’re ready to tune the edge. Before you decide on the most appropriate angle for your board, first check the manufacturer’s specifications. While most boards come tuned at a 90º angle, some companies do bevel their rails - a good thing to know before you start filing away at them.
Once you’ve decided on an angle, secure your file into the appropriate file guide (some guides are multi-angled and adjustable, while others are designed to file at a particular angle and come in a set with other holders). Begin with the base edge. Some people will take a Sharpie marker and run it along the edge before beveling, allowing them to see exactly where the file has removed metal. While this is a good tip, it’s obviously not necessary. Again, work from tip to tail applying pressure to the rail as the file scrapes off the metal to your specifications. You shouldn’t need more than two or three passes to get the bevel sharp and even. Repeat the process for the side edge. When you’re finished, you should have a clean edge, which you can dust off with a dry rag before continuing. Once you’ve completed the bevel on either rail, you can move on to use the diamond stone.
Use the diamond stone to remove any leftover notches or metal shards left in the rail from the filing. Hold it at a 90° angle and run it down the edges from tip to tail. Finish off using your gummy stone again, to add polish and luster to the metal. Run a rag over the edges, clean up your mess, and start waxing!
That is, unless you want to detune your edges first…
EDGE DETUNING
MATERIALS
- Gummy stone
- Dry rags
- Edge file
- File guide
- Diamond stone
DIRECTIONS
Nobody likes catching an edge on the slopes, especially while barreling down a chute or hitting the monster kink rail. It can be painful and you rarely see it coming. Detuning the edges of your snowboard at the tip and tail can lessen your chances of catching an edge by dulling the most likely problem spots; plus, it’s not at all difficult to do yourself. Once you’ve finished beveling your edges (see above), use a flat file to round out about an inch of the rail at each end of your effective edge. In other words, note where the board turns up at the tip and tail, and detune from that point toward the center for about an inch. You’ll end up working on four areas of your board, two on each edge.
After you dull these spots, run a gummy stone over the edges again, paying close attention to the detuned areas as you polish. Now you’re ready to wax.
WAXING
MATERIALS
- Waxing Iron
- Snowboard wax
- Scraper
- Scotchbrite pad
- Brass, nylon or horsehair brush (optional)
BACKGROUND
While some people will wax their boards each time they hit the hill, the general consensus seems to be that waxing once every two or three times you ride is enough to reap the benefits. Additionally, some riders apply a coat of wax (but don’t scrape it) before storing their boards for the summer to keep them from oxidizing.
So what exactly does waxing do for your board? First, the wax increases the glide of the base, meaning your board will ride faster and smoother on the snow (especially useful on warm, mushy spring days). Also, the build-up of wax acts as a shield against rocks and rails, absorbing the small cuts that might otherwise damage the base material during the course of a day. Finally, the use of wax prolongs the durability of the board, meaning a longer-lasting investment.
DIRECTIONS
Waxing your board at home is simple and easy if you are set up with the right materials. To begin with, the space you’ll use to maintain your board should be dry, with decent ventilation. As mentioned earlier, your station should be at a level where you can easily interact with your board – hip height is good for achieving even, controlled strokes. Begin by cleaning your board, repairing any dings, and performing any necessary tuning on your edges (instructions and tips above). Once you’ve finished with these first steps, plug in your iron, which should be non-Teflon and rust free, and set it to low-to-medium heat. There are several snowboard wax irons out there to choose from, but an old iron from home will work fine, too. Obviously, this process will render the iron unusable on clothes from now on, so don’t use your good one.
Next, moving the iron continuously, re-heat the wax on the base, spreading it along the length and width of the board. Some riders don’t worry about the tip and tail, as these parts don’t usually touch the snow directly, but if you have the time it’s not a bad idea to give these areas a little lovin’. The layer of wax should be even and about 2 millimeters thick. Leave the wax to dry, giving it about 15-20 minutes for the heat to expand the pores of the base material and soak in.
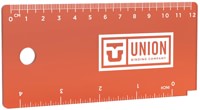
Using either a plastic, Plexiglas or metal scraper, begin by tackling any dried wax on the steel edges (both side and base) to make sure that they remain sharp and rigid. Next, remove the excess wax along the base using controlled, lengthwise strokes. Your technique will affect the outcome of your efforts, so be sure that you’re positioned in a way to maximize your strength, control and pressure. You’ll probably want to start by standing at the tail of your board, bringing the tool from the middle of the board towards your body. Hold the scraper at the top with both hands; it should make about a 30º angle with the base, with the bottom of the scraper closer to you than the top as you apply pressure and pull (scraper angled away but moving toward you). This is a general guideline, so do what you find is most effective using your scraper and your work station.
As you scrape the excess wax off, try to keep your hands off the base. The oils from your hands are part of the reason you just finished cleaning your base, so avoid touching it even though it looks so nice and smooth. Hold the board up and look down the length of it, making sure that there aren’t any clumps anywhere, and that the grain of the wax runs lengthwise.
Assuming all is well, you are now ready to buff, so grab a Scotchbrite pad – one of those green, rough grease remover pads that you have in your kitchen, next to the sponge. (Use a new one.) Buff the base in short, quick motions, again lengthwise from tip to tail, to remove any remaining wax residue and give the board a finished look and feel.
Some people will conclude their board waxing by running a brass, nylon or horsehair brush across the base in a crosshatch pattern, alleviating some of the potential suction between the snow and the board. The idea behind this technique is to force snow into the tiny channels on the board’s base, melting it with the heat generated by riding, thus hydroplaning the board across the hill… quickly. You can also throw on some fluorinated or paste wax to make your board even more epically fast, but this should always be combined with a true hot-waxing.
So there you go. A faster, sharper, longer-lasting board. With regular tuning, waxing and cleaning, your board will be solid and speedy for seasons to come.
Now that you are a snowboarder, be sure to keep checking back with Tactics to see what’s new in the snow store!
Shop Snowboard Tune & Wax Supplies


